

Introduction#
One of the main motivations that led me to develop this homelab experiment was my desire to learn new infrastructure technologies. In previous posts, I started exploring components that I had never worked with before, such as pfSense routing and Proxmox VM provisioning.
The hardest challenge that I wanted to tackle when I started, however, remained in the back of my mind until I decided to give it a shot. I am, of course, talking about the dreaded Kubernetes, probably the most widely used containerization and orchestration platform after Docker. Now that my setup has become rather intertwined, with different hosts, virtualization engines, NixOS VMs, networking, and more, I wanted to explore the possibility of balancing the load of my services across different nodes while learning a new technology along the way.
This small series (which I hope to keep consistent) will be about exploring my curiosity about the world of Kubernetes. Specifically, I am starting with a few questions that I would like to have answered:
- What is the best way to deploy VMs/machines to join them in a Kubernetes cluster?
- How can I prevent configuration drift, while keeping my environment as declarative as possible, using CI/CD tools?
- Can I reserve some nodes of a Kubernetes cluster for specific roles (e.g., use Zero as a sort of “database” for data-heavy services) while keeping the deployment of services as automated as possible?
There will surely be many other questions that arise naturally as I move forward, but that’s the fun part!
For starters#
This mini-series won’t go deep into the details of how to use Kubernetes: I have neither the skills nor the desire to do this, and it’s not my final goal. This series of posts will act as a “logbook” of my progress.
The plan#
In this first post, I decided to build the foundation of my cluster, which, for now, will be hosted on three VMs in Lancelot’s Proxmox using Talos (to answer the first of the three questions I previously posed).
About Talos#
Talos is a Linux-based OS that aims to facilitate the creation of a Kubernetes cluster using an IaC approach. The idea is very simple: similarly to NixOS, Talos allows you to create a configuration for Talos VMs, which can be applied by connecting to its API:
$ talosctl apply-config --insecure -n <node_address> --file controlplane.yaml --talosconfig=./talosconfigTalos then handles all aspects related to node security, including:
- Hardening the OS so that SSH access is not possible
- Allowing interaction with the node only through Talos’s API, authenticated via mTLS
- Providing an immutable filesystem with as small an attack surface as possible
- Much more
Starting#
Install Talos locally#
To manage the Talos VMs, it is necessary to install the talosctl tool to communicate with the API:
brew install siderolabs/tap/talosctlCreate the VMs#
The three Talos VMs will be provisioned using Proxmox. Talos allows the creation of custom images with some extensions preinstalled through its online service, Image Factory. I decided to use it to create a disk image with:
- Tailscale
- The QEMU Agent
- Support for ZFS filesystems
- Secure Boot support
The resulting image can be downloaded from this link. Image Factory then allows you to download the raw disk image, which can be imported into Proxmox. The final image is saved with the .raw.img extension:
# Resource containing the disk image of Talos
resource "proxmox_download_file" "talos-disk-image" {
  decompression_algorithm = "zst"
  content_type            = "iso"
  datastore_id            = var.proxmox-iso-pool-name
  node_name               = local.proxmox.node_name
  url                     = var.talos-disk-image-url
  file_name               = var.talos-disk-filename
  checksum                = var.talos-disk-image-checksum
  checksum_algorithm      = "sha256"
  overwrite               = false
}
Then, I added the properties of the Kubernetes nodes to my topology.toml file:
# ============================= KUBERNETES ===========================

[kubernetes.configs]
base_worker_hostname = "k8s-"
controller_hostname = "k8s-controller"
workers = ["worker1", "worker2"]

[kubernetes.controller]
cpu_cores = 4
memory_size = "8192"
disk_size = 100

[kubernetes.workers.worker1]
worker_index = 1
cpu_cores = 4
memory_size = "8192"
disk_size = 100

[kubernetes.workers.worker2]
worker_index = 2
cpu_cores = 4
memory_size = "8192"
disk_size = 100
Then, I wrote the definition for the controller VM:
# Resource creating the Kubernetes controller with Talos
resource "proxmox_virtual_environment_vm" "talos-controller-vm" {
  name        = local.kubernetes.configs.controller_hostname
  description = "Talos controller VM, part of the Kubernetes cluster."
  tags        = ["talos", "controller", "kubernetes"]

  node_name = local.proxmox.node_name
  vm_id     = var.talos-worker-vm-base-id

  machine = "q35"
  bios    = "ovmf"

  efi_disk {
    datastore_id      = var.proxmox-disks-pool-name
    type              = "4m"
    pre_enrolled_keys = false
  }

  agent {
    enabled = true
  }

  cpu {
    cores = local.kubernetes.controller.cpu_cores
    type  = "host"
  }

  memory {
    dedicated = local.kubernetes.controller.memory_size
  }

  disk {
    file_id     = proxmox_download_file.talos-disk-image.id
    interface   = "scsi0"
    file_format = "raw"
    iothread    = true
    discard     = "on"
    size        = local.kubernetes.controller.disk_size
  }

  boot_order = ["scsi0"]

  network_device {
    bridge  = local.proxmox.homelab_bridge
    vlan_id = local.docker_network.vlan_id
  }

  operating_system {
    type = "l26"
  }

  serial_device {

  }

  tpm_state {
    datastore_id = var.proxmox-disks-pool-name
    version      = "v2.0"
  }
}
And then a similar definition for the worker VMs, iterating over the topology’s kubernetes.configs.workers set:
# Resource creating the Kubernetes workers with Talos
resource "proxmox_virtual_environment_vm" "talos-worker-vm" {
  for_each    = toset(local.kubernetes.configs.workers)
  name        = "${local.kubernetes.configs.base_worker_hostname}${each.key}"
  description = "Talos worker VM ${each.key}, part of the Kubernetes cluster."
  tags        = ["talos", "kubernetes"]

  node_name = local.proxmox.node_name
  vm_id     = var.talos-worker-vm-base-id + local.kubernetes.workers["${each.value}"]["worker_index"] + 1

  machine = "q35"
  bios    = "ovmf"

  efi_disk {
    datastore_id      = var.proxmox-disks-pool-name
    type              = "4m"
    pre_enrolled_keys = false
  }

  agent {
    enabled = true
  }

  cpu {
    cores = local.kubernetes.workers["${each.key}"].cpu_cores
    type  = "host"
  }

  memory {
    dedicated = local.kubernetes.workers["${each.key}"].memory_size
  }

  disk {
    file_id     = proxmox_download_file.talos-disk-image.id
    interface   = "scsi0"
    file_format = "raw"
    iothread    = true
    discard     = "on"
    size        = local.kubernetes.workers["${each.key}"].disk_size
  }

  boot_order = ["scsi0"]

  network_device {
    bridge  = local.proxmox.homelab_bridge
    vlan_id = local.docker_network.vlan_id
  }

  operating_system {
    type = "l26"
  }

  serial_device {

  }

  tpm_state {
    datastore_id = var.proxmox-disks-pool-name
    version      = "v2.0"
  }
}
All machines are configured to use secure boot via the efi_disk. I also enabled TPM, so that the disks of all VMs can be encrypted using LUKS. The virtual TPM of Proxmox can then verify that the machine’s boot order has not been maliciously tampered with and, if not, release the LUKS key to decrypt the drive without requiring a password.
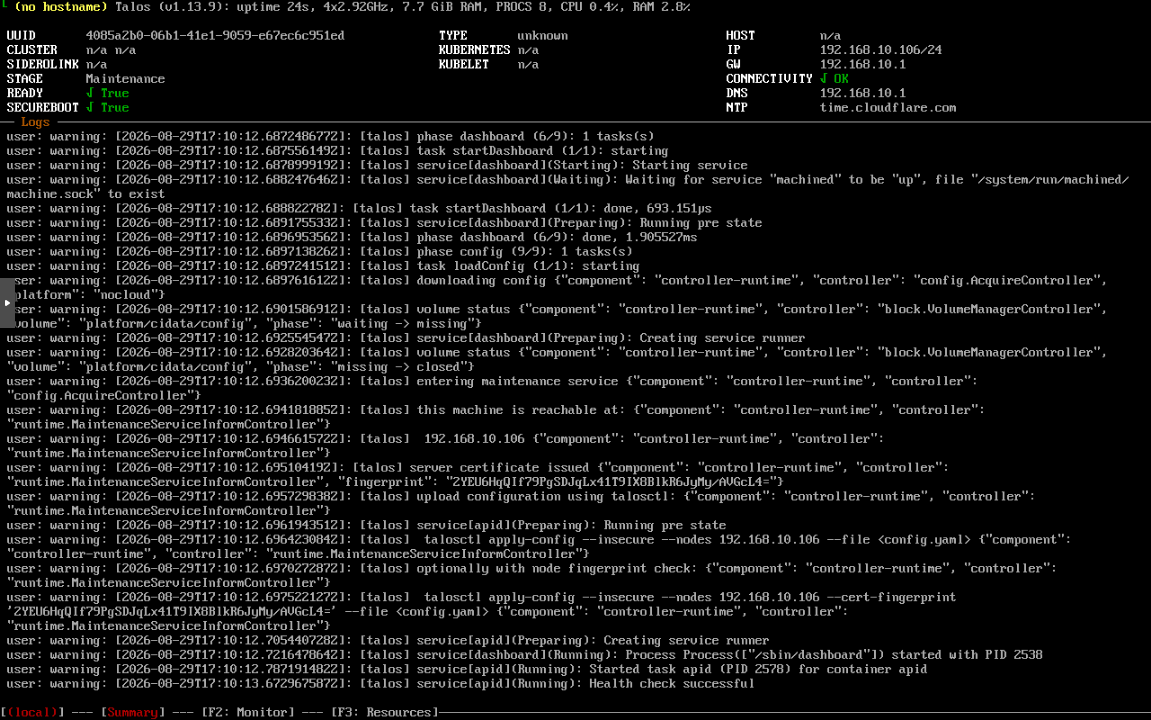
Once the VM boots correctly, this is the dashboard displayed in the console:
Configuring Talos Nodes#
Reach the Nodes using Tailscale#
All machines are configured to run on VLAN 10, meaning that the computer I use to manage them cannot currently reach them. This issue could be solved in one of two ways:
- Creating NAT translation rules, so that the ports of the machines can be reached from pfSense’s IP
- Creating a route advertisement in the router’s Tailscale configuration. This way, connections to hosts under
192.168.10.0/24are routed through Tailscale to the actual hosts.
The second option can be applied much more easily and is also trivial to revert once the Talos configuration is complete and the machines connect to the Tailscale network directly. The only thing to do is to add the routing rule in the router’s web interface and apply an ACL modification:
// Temporarily allow connecting to the 192.168.10.0/24 subnet
// to administer the Talos nodes' configuration
{
    "action": "accept",
    "src": ["*"],
    "dst": ["192.168.10.0/24:*"]
},
Reproducible Approach#
Talos docs explain that, in order to maintain a reproducible Talos configuration and prevent configuration drift, it is better to maintain a couple of separate files:
- A
secrets.yaml, which contains the cluster’s secrets. This can be encrypted with SOPS and then committed to Git - One or more patch files, which contain the actual configurations of the Talos nodes. In my case, these files will, for example, configure ZFS and Tailscale on the Kubernetes nodes.
The file containing the secrets can be generated directly using talosctl:
root@homelab-dc /workspace/kubernetes/talos main*
❯ talosctl gen secrets -o secrets.yaml

root@homelab-dc /workspace/kubernetes/talos main*
❯ ls -la secrets.yaml
.rw-------@ 8.9k root 30 Aug 10:20 secrets.yaml
In order to be able to commit it, a small .sops.yaml file must be added to the directory with the secrets.yaml file:
keys:
  - &admin age1xxxx
creation_rules:
  - path_regex: ^secrets\.yaml$
    key_groups:
      - age:
          - *admin
Then, the secrets file can be encrypted using sops -e -i secrets.yaml. Once the secrets are in place, it is possible to start adding patches to customize the nodes.
Configure LUKS#
Since secure boot is enabled, it is necessary to configure the machines to use LUKS encryption. The secure boot page in the Talos docs suggests adding a tpm-disk-encryption.yaml file, which will live under a patches/ directory:
machine:
  systemDiskEncryption:
    ephemeral:
      provider: luks2
      keys:
        - slot: 0
          tpm: {}
    state:
      provider: luks2
      keys:
        - slot: 0
          tpm: {}
Configure Tailscale#
Since the subnet routing solution described above was only meant to be temporary, it is also necessary to configure the nodes to connect to the self-hosted tailnet. This can be done by adding another patch, following the extension’s documentation:
apiVersion: v1alpha1
kind: ExtensionServiceConfig
name: tailscale
environment:
    - TS_AUTHKEY=hskey-xxxx
    - TS_EXTRA_ARGS=--login-server https://vpn.example.com
    - TS_ACCEPT_DNS=true
However, we have a security issue here: the plain configuration file stores a secret, the Tailscale auth key, in plaintext. This might not be an issue, since auth keys can be made to expire in as little as 1m, but it would still be better to hold this value in an encrypted manner. The best solution I came up with was the following: keep the tailscale.yaml file with the secret, but configure SOPS to specifically encrypt the environment key:
- path_regex: ^patches\/tailscale\.yaml$
encrypted_regex: "^(environment)$"
key_groups:
  - age:
      - *admin
Then, encrypting the file produces something like this:
apiVersion: v1alpha1
kind: ExtensionServiceConfig
name: tailscale
environment:
    - ENC[AES256_GCM,data:...==,type:str]
    - ENC[AES256_GCM,data:...=,tag:5sjIA3cMw+tzwo0WffrY6Q==,type:str]
sops:
    age:
        - enc: |
            -----BEGIN AGE ENCRYPTED FILE-----
            ...
            -----END AGE ENCRYPTED FILE-----
          recipient: age1xxx
    encrypted_regex: ^(environment)$
    lastmodified: "2026-08-30T10:49:44Z"
    mac: ENC[AES256_GCM,data:3u...UQ==,type:str]
    version: 3.13.2
Configure ZFS#
The last piece of configuration shared by all the nodes enables ZFS support. This is much simpler than the other two, as it amounts to:
machine:
  kernel:
    modules:
- name: zfsRefactor#
The configuration is now ready to use. Applying it to the Talos nodes roughly follows this strategy:
- From the patches and the secrets, generate the actual configuration files that will be applied, namely:
talosconfig, which contains the configuration for thetalosctltool to communicate with the nodescontrolplane.yaml, which has the configuration for the control plane (one, in this case)worker.yaml, which has the configuration for the worker nodes (two, in this case)
- Apply the configuration files:
controlplane.yamlfor the CP andworker.yamlfor the workers. The patches are loaded during application and can either be specific to a node (e.g., a patch that sets a hostname) or common (such as the ZFS, Tailscale, and LUKS patches described above).
The first part is relatively easy to automate with a small gen-config.sh:
#!/bin/bash

set -euo pipefail

export CONTROL_PLANE_IP="${1:?Pass the control plane\'s IP.}"
export CLUSTER_NAME="${2:?Pass the cluster\'s name.}"

sops exec-file secrets.sops.yaml \
  'talosctl gen config \
    "$CLUSTER_NAME" \
    "https://$CONTROL_PLANE_IP:6443" \
    --output-dir clusterconfig \
    --install-image factory.talos.dev/installer/ce4c980550dd2ab1b17bbf2b08801c7eb59418eafe8f279833297925d67c7515:v1.13.7 \
    --with-secrets {} \
    --force'
This decrypts the secrets.sops.yaml and passes the decrypted file’s path to talosctl.
Applying the configuration is more complicated. I wanted a script that:
- Takes a map of hosts with a name and an address, such as
worker1=192.168.x.y - For each host:
- Lists the patches to be applied: all those under
patches/commonand those underpatches/<hostname>/ - Decrypts each
.sopsfile using SOPS - Applies the configuration
- Lists the patches to be applied: all those under
The resulting script was generated with help from ChatGPT. Since the procedure is already becoming a bit complicated, in the future it might be worth moving to managing the Talos configuration using OpenTofu.
Apply the Configs#
Applying the configuration required only running the scripts:
❯ ./gen-config.sh $CONTROL_PLANE_IP talos-proxmox-cluster
generating PKI and tokens
Created clusterconfig/controlplane.yaml
Created clusterconfig/worker.yaml
Created clusterconfig/talosconfig

❯ ./apply-config.sh --init cp1=192.168.10.106 worker1=192.168.10.107 worker2=192.168.10.108

cp1 (192.168.10.106)
Base: clusterconfig/controlplane.yaml
  decrypt: patches/common/tailscale.sops.yaml
  patch:   patches/common/tpm-disk-encryption.yaml
  patch:   patches/common/zfs.yaml

Applying configuration to cp1 (192.168.10.106)
Mode: authenticated
Applied configuration without a reboot

worker1 (192.168.10.107)
Base: clusterconfig/worker.yaml
  decrypt: patches/common/tailscale.sops.yaml
  patch:   patches/common/tpm-disk-encryption.yaml
  patch:   patches/common/zfs.yaml

Applying configuration to worker1 (192.168.10.107)
Mode: authenticated
Applied configuration without a reboot

worker2 (192.168.10.108)
Base: clusterconfig/worker.yaml
  decrypt: patches/common/tailscale.sops.yaml
  patch:   patches/common/tpm-disk-encryption.yaml
  patch:   patches/common/zfs.yaml

Applying configuration to worker2 (192.168.10.108)
Mode: authenticated
Applied configuration without a reboot
The --init flag in the apply command is used to supply the --insecure flag to Talos, which is needed for the initial setup.
After the application finished, the last step was to run the bootstrap on the control plane:
export TALOSCONFIG="clusterconfig/talosconfig"
talosctl config endpoint $CONTROL_PLANE_IP
talosctl config node $CONTROL_PLANE_IP
talosctl bootstrap
Then, it is possible to retrieve the configuration needed to use kubectl, the CLI tool for managing Kubernetes clusters, from the CP:
talosctl kubeconfig -e $CONTROL_PLANE_IPIf the configuration is working, this should be the output:
❯ kubectl get nodes
NAME            STATUS   ROLES           AGE   VERSION
talos-6j9-09e   Ready    control-plane   34m   v1.36.2
talos-9mz-c59   Ready    <none>          33m   v1.36.2
talos-jff-9ly   Ready    <none>          33m   v1.36.2
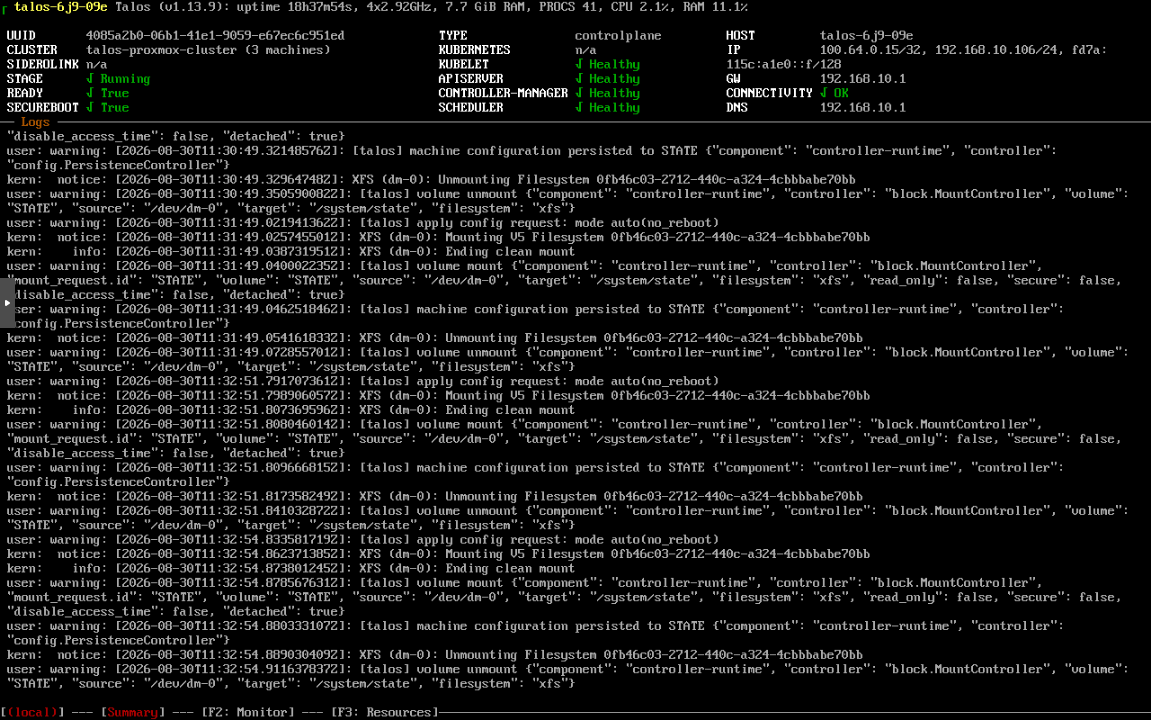
And the control plane’s console looks like this:
Additional Configurations#
Load Balancer#
If this were a standard setup with Docker or Docker Compose, creating the nodes would be enough for an initial setup. However, the nature of Kubernetes requires an additional component to be added to the cluster to allow external internet connectivity: a load balancer.
When Kubernetes has to deploy a new pod, it performs a scheduling calculation to determine which of the currently available nodes is best suited to host it. This is great from a computation standpoint, but it makes routing traffic to the pod much more complicated. If we were to, say, expose a port on the node using the NodePort directive, traffic routing would break immediately once the pod was recreated on another node. This is why Kubernetes allows us to create a “load balancer”, which is a component tasked with dynamically allocating an IP address on a network that receives external traffic and routing it to the corresponding internal pod.
In cloud settings, the load balancer is typically managed by the cloud provider, which is tasked with assigning a public IP to the machine and linking it to the Kubernetes cluster. This self-hosted Proxmox solution, however, has no such feature and thus requires maintaining additional software to perform this balancing, called MetalLB.
pfSense Configuration#
Before installing MetalLB on the cluster, it is first necessary to configure the pfSense router to reserve an IP address pool dedicated to MetalLB, which will then dynamically assign addresses to any node in the cluster when needed.
For this simple lab, I decided that just one address would be needed to route all traffic to Kubernetes pods: 192.168.10.254/24. If another reverse-proxy address is needed in the future, I can reserve it later.
MetalLB Installation#
For starters, the MetalLB native mode configuration must be applied to the cluster. In order to apply configurations more easily, I will use Kustomize, which simplifies the declarative management of these sorts of resources:
apiVersion: kustomize.config.k8s.io/v1beta1
kind: Kustomization
namespace: metallb-system

resources:
  - github.com/metallb/metallb/config/native?ref=v0.16.1
  # - ./vlan10-l2.yaml
The file vlan10-l2.yaml will contain the actual configuration for MetalLB and will be commented out for the first apply, which can be done by running the following command in the directory containing kustomization.yaml:
kubectl apply -k .The deployment process can be tracked using this command:
kubectl wait \
    --namespace metallb-system \
    --for=condition=available \
    deployment/controller \
    --timeout=120s
Once everything is up and running, it is necessary to add the configuration for MetalLB to reserve the address pool:
apiVersion: metallb.io/v1beta1
kind: IPAddressPool
metadata:
  name: vlan10
  namespace: metallb-system
spec:
  addresses:
    - 192.168.10.254-192.168.10.254
  avoidBuggyIPs: true
---
apiVersion: metallb.io/v1beta1
kind: L2Advertisement
metadata:
  name: vlan10
  namespace: metallb-system
spec:
  ipAddressPools:
    - vlan10
The previously commented line must be uncommented, and reapplying the configuration will configure MetalLB. To test that this has worked correctly, it is possible to define a temporary LoadBalancer using nginx in a test/ subdirectory:
apiVersion: kustomize.config.k8s.io/v1beta1
kind: Kustomization
namespace: metallb-system

resources:
- ./test-nginx.yamlapiVersion: apps/v1
kind: Deployment
metadata:
name: metallb-test
namespace: default
spec:
replicas: 2
selector:
matchLabels:
app: metallb-test
template:
metadata:
labels:
app: metallb-test
spec:
securityContext:
runAsNonRoot: true
seccompProfile:
type: RuntimeDefault
containers:
- name: nginx
image: nginxinc/nginx-unprivileged:stable-alpine
securityContext:
allowPrivilegeEscalation: false
capabilities:
drop:
- ALL
ports:
- containerPort: 8080
name: http
---
apiVersion: v1
kind: Service
metadata:
name: metallb-test
namespace: default
spec:
type: LoadBalancer
selector:
app: metallb-test
ports:
- name: http
port: 80
targetPort: httpAnd the test can be applied via:
kubectl apply -k test/If everything is working correctly, it should be possible to reach the nginx pod via 192.168.10.254:80:
❯ curl -v http://192.168.10.254
*   Trying 192.168.10.254:80...
* Connected to 192.168.10.254 (192.168.10.254) port 80
* using HTTP/1.x
> GET / HTTP/1.1
> Host: 192.168.10.254
> User-Agent: curl/8.14.1
> Accept: */*
>
* Request completely sent off
< HTTP/1.1 200 OK
< Server: nginx/1.30.4
< Date: Sat, 05 Sep 2026 13:51:41 GMT
< Content-Type: text/html
< Content-Length: 896
< Last-Modified: Wed, 15 Jul 2026 18:38:41 GMT
< Connection: keep-alive
< ETag: "6a57d3b1-380"
< Accept-Ranges: bytes
<
<!DOCTYPE html>
<html>
<head>
<title>Welcome to nginx!</title>
<style>
html { color-scheme: light dark; }
body { width: 35em; margin: 0 auto;
font-family: Tahoma, Verdana, Arial, sans-serif; }
</style>
</head>
<body>
<h1>Welcome to nginx!</h1>
<p>If you see this page, nginx is successfully installed and working.
Further configuration is required for the web server, reverse proxy,
API gateway, load balancer, content cache, or other features.</p>

<p>For online documentation and support please refer to
<a href="https://nginx.org/">nginx.org</a>.<br/>
To engage with the community please visit
<a href="https://community.nginx.org/">community.nginx.org</a>.<br/>
For enterprise grade support, professional services, additional
security features and capabilities please refer to
<a href="https://f5.com/nginx">f5.com/nginx</a>.</p>

<p><em>Thank you for using nginx.</em></p>
</body>
</html>
* Connection #0 to host 192.168.10.254 left intact
Longhorn for Persistent Volumes#
Another component usually needed for a functional Kubernetes cluster is a provider that allows creating persistent volumes, which are essentially comparable to unnamed Docker volumes. However, Kubernetes introduces several challenges to the standard Docker architecture, such as how to handle volumes when we have multiple nodes.
Many solutions exist, but Talos recommends using Longhorn as an easy-to-set-up solution. Longhorn is a block-storage system that replicates volumes across different nodes and manages snapshots and replication through a web UI.
Tweaking the Talos Extensions#
Before installing Longhorn, Talos explains that the base system must have two additional extensions configured: siderolabs/iscsi-tools and siderolabs/util-linux-tools. Adding these to the previous configuration via Image Factory generates a new image. To update the workers, use the following command:
talosctl \
   -e $CONTROL_PLANE_IP \
   -n $WORKER1_IP \
   upgrade \
   --image factory.talos.dev/metal-installer-secureboot/a0b486f4d2acbf34d2cc8b8c0d2c02e323ed29830b56f189eaa0e1649878e092:v1.14.0 \
   --wait \
   --drain=false
It is also important to update the Talos configs in worker.yaml and controlplane.yaml with the new image to make sure that the configs remain in sync with the remote state.
It is also necessary to create a UserVolumeConfig resource, which tells Talos which disks can be used for volume persistence:
apiVersion: v1alpha1
kind: UserVolumeConfig
name: longhorn
provisioning:
  diskSelector:
    match: disk.transport == 'nvme' && !system_disk
  grow: false
Install Longhorn#
The first step in installing Longhorn is to create a namespace with privileged permissions (which are needed to mount volumes on the filesystem):
kubectl create namespace longhorn-system
kubectl label namespace longhorn-system pod-security.kubernetes.io/enforce=privileged
Then, it is possible to install Longhorn easily using Helm:
kubectl -n longhorn-system rollout status deploy/longhorn-driver-deployer
kubectl get pods -n longhorn-system
If everything is working correctly, it should be possible to verify it:
$ kubectl get nodes.longhorn.io -n longhorn-system

NAME        READY   ALLOWSCHEDULING   SCHEDULABLE   AGE
worker-01   True    true              True          2m
Once Longhorn is up, a dashboard will be exposed to manage specific volumes’ properties. Since my Talos cluster currently has no load balancer configured to route traffic, I will show this dashboard in the next post. In the meantime, it should be possible to test that PersistentVolumes can indeed be created:
kubectl apply -f - <<EOF
apiVersion: v1
kind: PersistentVolumeClaim
metadata:
  name: longhorn-test-pvc
spec:
  accessModes:
    - ReadWriteOnce
  storageClassName: longhorn
  resources:
    requests:
      storage: 1Gi
EOF
Its status can be checked with:
kubectl get pvc longhorn-test-pvcTo make sure that this setup is reproducible, the commands that were executed manually can be rewritten as YAML resources:
apiVersion: v1
kind: Namespace
metadata:
  name: longhorn-system
  labels:
pod-security.kubernetes.io/enforce: privileged---
apiVersion: source.toolkit.fluxcd.io/v1
kind: HelmRepository
metadata:
name: longhorn-repo
namespace: longhorn-system
spec:
interval: 1m0s
url: https://charts.longhorn.io---
apiVersion: helm.toolkit.fluxcd.io/v2
kind: HelmRelease
metadata:
name: longhorn-release
namespace: longhorn-system
spec:
values:
defaultSettings:
defaultReplicaCount: 2
chart:
spec:
chart: longhorn
reconcileStrategy: ChartVersion
sourceRef:
kind: HelmRepository
name: longhorn-repo
version: v1.12.1
interval: 1m0sapiVersion: kustomize.config.k8s.io/v1beta1
kind: Kustomization
namespace: longhorn-system
resources:
- ./longhorn-namespace.yaml
- ./longhorn-helmrelease.yaml
- ./longhorn-helmrepo.yamlThese resources can be applied with:
kubectl apply -k infrastructure/longhornCoreDNS#
The final piece of configuration is needed to make sure that all Talos nodes can use Tailscale’s DNS entries. To do this, it is possible to define a ConfigMap resource to tweak the configuration of CoreDNS to:
- Enable the cluster’s internal DNS
- Forward all internal Tailscale domains to
100.100.100.100 - Cache DNS entries on the server
apiVersion: v1
kind: ConfigMap
metadata:
  name: coredns
  namespace: kube-system
data:
  Corefile: |
    .:53 {
      errors
      health {
        lameduck 5s
      }
      ready
      log . {
        class error
      }
      prometheus :9153

      kubernetes cluster.local in-addr.arpa ip6.arpa {
        pods insecure
        fallthrough in-addr.arpa ip6.arpa
        ttl 30
      }

      forward lorecorrias.dev 100.100.100.100

      forward . /etc/resolv.conf {
       max_concurrent 1000
      }
      cache 30 {
       disable success cluster.local
       disable denial cluster.local
      }
      loop
      reload
      loadbalance
    }
Adding another Kustomization manifest makes it possible to apply the configurations more easily:
apiVersion: kustomize.config.k8s.io/v1beta1
kind: Kustomization

resources:
  - ./coredns-configmap.yaml
Apply it with:
kubectl apply -k infrastructure/corednsWrapping Up#
Now the new Talos Kubernetes cluster is ready to run actual pods! The current directory structure is already pretty solid:
.
├── infrastructure
│   ├── coredns
│   ├── longhorn
│   └── metallb
│       └── test
└── talos
    ├── clusterconfig
    └── patches
        ├── common
        ├── cp1
        ├── worker1
        └── worker2
In the following posts, I will go into more depth on how to set up Traefik and Flux for continuous integration of the cluster from the repository. For now, thanks for following!