

The NixOS Experiment#
In this new experiment of restructuring my Homelab, I wanted to take a deeper look at concepts such as Infrastructure as Code and reproducible environments. I have always been fascinated with the idea of creating an host whose configuration atomically defined the state of the machine, making sure that no change is applied unless specifically declared.
The easiest way to get into this world is arguably to start with Ansible. Although I think Ansible is a great tool, I’ve always found its “statelss” nature to be a bit of a nuissance. Don’t get me wrong: the idempotency of Ansible when running tasks is probably its greatest strenght, as it’s what makes it so easy to be executed. However, I am an even bigger fan of OpenTofu precisely because of its configuration-based flow: if you deploy the same command twice, OpenTofu will first verify that the remote state is not already configured, since it maintains a local state of the deployed machines, before applying it for a second time.
NixOS#
For this reasons, I wanted to try and explore NixOS. The nature of NixOS forces the user to create a single configuration file where all options of my deployed VM can be specified. For example: I can install and configure Docker, specify which users I want created, and so on. This is kind of the “OpenTofu” version of “Ansible”: normally, I would replicate these same configurations by writing an Ansible playbook containing all the commands to be executed on the remote host. The problem, however, is that this does not guarantee me that the remote machine will precisely follow the local configuration, since I could manually update the remote machine, create files, etc. The advantages of having a single configuration file are several:
- I can pin package/firmware versions, and use tools like Renovate Bot to edit the configuration using CI/CD
- Updating the system becomes as easy as running the command to re-apply the new configuration
- In case the machine gets nuked, I can easily redeploy the same one on a new host (of course this does not mean that backups become unnecessary)
The Plan#
The overall plan was to orchestrate the tools like this:
- OpenTofu, to declaratively deploy the NixOS Docker VM on Lancelot. NixOS offers an “empty image” that can then be configured.
- Nix, to write the declarative configuration that installs Docker, the users, SSH access, etc.
nixos-anywhere, which can be used to deploy the Nix configuration on the VM for the first time.nixos-rebuild, which will be executed to update the remote configuration every time the local time has changed, so that they are always synced.
Execution#
Structure#
For starters, I configured a small git repository to store all of the required configurations. My idea for the layout was something like this:
.
├── guren
├── lancelot
│   └── tofu
└── zero
Of course, I might decide to change it in the future. Configuration-wise, I decided (for now) to adopt the SOPS approach: env files containing sensitive values will be committed as encrypted blobs. The idea is that each tool requires its set of credentials: OpenTofu needs the access keys for Terraform; Ansible might require SSH keys, and so on. Each tool has one or multiple dedicated .env/yaml file containing passwords/tokens/etc., all encrypted with one master AGE key. This is not great from a security point of view, but since I am starting with a single env file I think it’s acceptable.
Preparation#
The first tool to be configured for Lancelot is Proxmox. Proxmox configuration, as I said before, requires a couple credentials, namely:
- The Proxmox UI’s URL
- The Proxmox user used during authentication
- The API key used to authenticate
In order to achieve better isolation, the Terraform provider of Proxmox’s guide suggests creating a dedicated user with special permissions to instantiate and manage VMs:
# Create a special user for Terraform
pveum user add terraform@pve

# Add roles to the new user
pveum role add Terraform -privs "Realm.AllocateUser, VM.PowerMgmt, VM.GuestAgent.Unrestricted, Sys.Console, Sys.Audit, Sys.AccessNetwork, VM.Config.Cloudinit, VM.Replicate, Pool.Allocate, SDN.Audit, Realm.Allocate, SDN.Use, Mapping.Modify, VM.Config.Memory, VM.GuestAgent.FileSystemMgmt, VM.Allocate, SDN.Allocate, VM.Console, VM.Clone, VM.Backup, Datastore.AllocateTemplate, VM.Snapshot, VM.Config.Network, Sys.Incoming, Sys.Modify, VM.Snapshot.Rollback, VM.Config.Disk, Datastore.Allocate, VM.Config.CPU, VM.Config.CDROM, Group.Allocate, Datastore.Audit, VM.Migrate, VM.GuestAgent.FileWrite, Mapping.Use, Datastore.AllocateSpace, Sys.Syslog, VM.Config.Options, Pool.Audit, User.Modify, VM.Config.HWType, VM.Audit, Sys.PowerMgmt, VM.GuestAgent.Audit, Mapping.Audit, VM.GuestAgent.FileRead, Permissions.Modify"

# Create the user used to authenticate with the API
pveum aclmod / -user terraform@pve -role Terraform

# Create the token for API authentication
pveum user token add terraform@pve provider --privsep=0
Once the token was created, I laid down the base for the Proxmox provider:
terraform {
  required_providers {
    proxmox = {
      source  = "bpg/proxmox"
      version = "0.111.1"
    }
    sops = {
      source  = "carlpett/sops"
      version = "1.4.1"
    }
  }
}

provider "sops" {}

provider "proxmox" {
  endpoint  = ephemeral.sops_file.proxmox_secrets.data["PM_API_URL"]
  api_token = "${ephemeral.sops_file.proxmox_secrets.data["PM_API_TOKEN_ID"]}=${ephemeral.sops_file.proxmox_secrets.data["PM_API_TOKEN_SECRET"]}"
  insecure  = true

  ssh {
    agent    = true
    username = "terraform"

    node {
      name    = var.proxmox-node-name
      address = ephemeral.sops_file.proxmox_secrets.data["PM_ADDRESS"]
    }
  }
}
SSH had to be configured to allow uploading snippets, like cloud-init configurations.
Using self-signed certificates in Proxmox requires setting insecure = true, meaning that the TLS connection is not verified. This, of course, is not safe, and shall be fixed once my environment can manage signed certificates.
# Sops file containing all the credentials. Must be
# encrypted before running OpenTofu.
ephemeral "sops_file" "proxmox_secrets" {
  source_file = ".env"
}
Ephemeral blocks are useful to avoid that secrets get leaked inside the state file of Terraform. All that’s left is to add a small .env file with the required credentials:
PM_API_URL=""
PM_API_TOKEN_ID=""
PM_API_TOKEN_SECRET=""
PM_ADDRESS=""
And generate both the Age key and the required SOPS configuration file:
# Create the directory containing the SOPS key
mkdir -p ~/.config/sops/age

# Generate the key.
age-keygen -o ~/.config/sops/age/keys.txt

# Add the public key to the SOPS configuration file.
cd lancelot/tofu
age-keygen -y ~/.config/sops/age/keys.txt | \
      xargs -I {} printf 'creation_rules:\n  - age: %s\n' {} > .sops.yaml

# Encrypt the env file under lancelot/
sops -e -i .env
After encryption, the .env looks like this:
PM_API_URL=ENC[AES256_GCM,data:2uM=,iv:SLxOqMWUr9sI+zSsab4Q2IYnrs78VHxsB1lze9ELLFk=,tag:vU8+rEaWLJrNsbeZ1tsqjg==,type:str]
PM_API_TOKEN_ID=ENC[AES256_GCM,data:avgdsByk0qCDA/1hn20CbbLeP+Fy6FhYMZGf4A==,iv:53V9pILsWLVIkbQxzGqPgnQgX0G4Ria6nOklxFXetyA=,tag:G9vu87BZAzvJyXDGBnisgw==,type:str]
PM_API_TOKEN_SECRET=ENC[AES256_GCM,data:UB9F5V/EPuQUv4A2FtBWNcjb9X+UO/Pk2uD1zMJd1sEPHploLY4=,iv:YLxzbxo88J6GWnXQ976IpVYB9g4wEVeYZhD1FpFzhgc=,tag:VJU7CwRFVtsSM0osvy5ijQ==,type:str]
# ...
sops_unencrypted_suffix=_unencrypted
sops_version=3.13.2
Now, after running tofu init I can check the validity of the configuration:
❯ tofu validate
Success! The configuration is valid.
Recovering Created Resources#
Since all of the configuration I made until now is saved only in my current Proxmox instance, I decided that the best choice would be to specify these same resources in Proxmox as well. This way, the configuration of the bridges, VLANs, etc, is guaranteed to be consistent with the local OpenTofu files. However, in order to avoid conflicting with resources that already exist, it is necessary to use the import block, like this:
import {
  to = proxmox_network_linux_bridge.homelab-bridge
  id = "${var.proxmox-node-name}:${var.homelab-bridge-name}"
}

# The homelab bridge used to connect all devices. The segmentation of the network
# is handled by the switch at layer 2.
resource "proxmox_network_linux_bridge" "homelab-bridge" {
  node_name = var.proxmox-node-name
  name      = var.homelab-bridge-name

  comment = "Bridge for internal Homelab devices"

  ports = var.homelab-bridge-ports

  vlan_aware = true
  vids       = "2-4094"
}
This way, the resource is imported and later modified if any changes are made and applied. Of course, the same thing must be done for the WAN bridge and the pfSense VM.
Creating a small Bastion VM#
Before moving on to the creation of the NixOS VM, I wanted to configure a tiny VM which would act as a bastion between VLANs. I configured said VLAN in the previous post, so all that is left is to create the container and attach it to it:
resource "proxmox_download_file" "bastion_vm_disk" {
  content_type = "import"

  datastore_id = var.proxmox-iso-pool-name
  node_name    = var.proxmox-node-name

  url = var.bastion-vm-disk-download

  file_name = var.bastion-vm-filename

  checksum           = var.bastion-vm-disk-checksum
  checksum_algorithm = "sha512"

  overwrite           = false
  overwrite_unmanaged = false
}

resource "proxmox_virtual_environment_file" "bastion_cloud_init" {
  content_type = "snippets"
  datastore_id = var.proxmox-iso-pool-name
  node_name    = var.proxmox-node-name

  source_raw {
    file_name = "bastion-cloud-init.yaml"

    data = templatefile("./templates/bastion-cloud-init.yml.tftpl", {
      hostname   = var.bastion-vm-name,
      ssh_pubkey = var.bastion-ssh-pubkey,
    })
  }
}

resource "proxmox_virtual_environment_vm" "bastion_vm" {
  name        = var.bastion-vm-name
  description = "Bastion VM used to manage homelab VLANs."

  node_name = var.proxmox-node-name
  vm_id     = var.bastion-vm-id

  started         = true
  on_boot         = true
  stop_on_destroy = true

  operating_system {
    type = "l26"
  }

  cpu {
    cores = var.bastion-vm-cores
    type  = "host"
  }

  memory {
    dedicated = var.bastion-vm-ram
  }

  scsi_hardware = "virtio-scsi-single"

  disk {
    datastore_id = var.proxmox-disks-pool-name
    import_from  = proxmox_download_file.bastion_vm_disk.id

    interface = "scsi0"
    size      = var.bastion-disk-size

    iothread = true
    discard  = "on"
    ssd      = true
  }

  initialization {
    datastore_id = var.proxmox-disks-pool-name

    ip_config {
      ipv4 {
        address = var.bastion-address
        gateway = var.bastion-gateway
      }
    }

    dns {
      servers = [
        var.bastion-gateway
      ]
    }

    user_data_file_id = proxmox_virtual_environment_file.bastion_cloud_init.id
  }

  network_device {
    bridge  = var.homelab-bridge-name
    vlan_id = var.homelab-management-vlan-id
    model   = "virtio"
  }

  agent {
    enabled = true
    trim    = true

    wait_for_ip {
      ipv4 = true
    }
  }

  boot_order = ["scsi0"]

  # Provides a useful Proxmox serial console for cloud images.
  serial_device {}
}
I used a small cloud-init template to:
- Update and upgrade apt packages
- Add a password to the root user (accessible only from the console)
- Create a dedicated
jumpuser which will be used as the SSH jump one. This user won’t be allowed to execute any command nor switch toroot - Install
sshandqemu-guest-agentand start them
#cloud-config
hostname: ${hostname}
manage_etc_hosts: true
package_update: true
package_upgrade: true

users:
  - name: jump
    shell: /bin/bash
    lock_passwd: true
    ssh_authorized_keys:
      - ${ssh_pubkey}

chpasswd:
  expire: false
  users:
    - name: root
      password: '${root_password_hash}'
      type: hash

ssh_pwauth: false

packages:
  - openssh-server
  - qemu-guest-agent
  - sudo
  - ca-certificates
  - curl
  - vim

write_files:
  - path: /etc/ssh/sshd_config.d/30-bastion.conf
    owner: root:root
    permissions: "0644"
    content: |
      # Forwarding-only jump account
      Match User jump
          AuthenticationMethods publickey
          MaxSessions 0
          PermitTTY no

          AllowTcpForwarding local
          PermitOpen *:22
          PermitListen none
          AllowStreamLocalForwarding no
          AllowAgentForwarding no
          X11Forwarding no
          PermitTunnel no
          PermitUserRC no
          GatewayPorts no
          PasswordAuthentication no
          KbdInteractiveAuthentication no
          PubkeyAuthentication yes
runcmd:
  - /usr/sbin/sshd -t
  - systemctl enable --now ssh
  - systemctl enable --now qemu-guest-agent
This jump box can be used by setting the ProxyJump option in the .ssh/config file:
Host bastion-jump
    HostName 192.168.0.251
    Port 222
    User jump

    PreferredAuthentications publickey
    PasswordAuthentication no
    KbdInteractiveAuthentication no

# NixOS VM under VNAT 10
Host nixos-vm
    HostName 192.168.10.102
    User nixos
    Port 22

    # Specifies that `bastion-jump` must be used to reach this host
    ProxyJump bastion-jump

    PreferredAuthentications publickey
    PasswordAuthentication no
    KbdInteractiveAuthentication no
Now the nixos-vm will be accessible via SSH like normal:
❯ ssh nixos-vm

[nixos@nixos:~]$
The Docker VM#
NixOS#
Before building the actual VM, I had to write the configuration file describing the state of the system.
NixOS configurations are collected in so-called “Flakes”. Flakes work by taking an input and an output: the input can be any other Nix file (like system libraries/modules, but also .nix configurations) and the output is what the Flake produces: in this case, that would be the actual NixOS system:
{
  description = "Lancelot NixOS configurations";

  inputs = {
    nixpkgs.url = "github:NixOS/nixpkgs/nixos-26.05";

    sops-nix = {
      url = "github:Mic92/sops-nix";
      inputs.nixpkgs.follows = "nixpkgs";
    };

    disko = {
      url = "github:nix-community/disko";
      inputs.nixpkgs.follows = "nixpkgs";
    };
  };

  outputs =
    {
      nixpkgs,
      sops-nix,
      disko,
      ...
    }:
    let
      system = "x86_64-linux";
    in
    {
      nixosConfigurations.nixos-docker = nixpkgs.lib.nixosSystem {
        inherit system;

        modules = [
          ./configuration.nix
          sops-nix.nixosModules.sops
          disko.nixosModules.disko
          ./disk-config.nix
        ];
      };
    };
}
This file is saved under a lancelot/nixos dir, which will contain all the other configurations (like hardware and general ones):
.
├── composes
│   └── komodo.yaml
├── configuration.nix
├── disk-config.nix
├── flake.lock
├── flake.nix
├── hardware-configuration.nix
├── komodo.nix
├── secrets
│   └── komodo.yaml
└── sops.nixThe configurations reported down here are just an initial draft: the definitive one will be published in the personal Git repo once it’s finished.
General Configurations#
The actual configuration file containing the state of the system will be placed under a lancelot/nixos/configuration.nix file:
# Edit this configuration file to define what should be installed on
# your system. Help is available in the configuration.nix(5) man page, on
# https://search.nixos.org/options and in the NixOS manual (`nixos-help`).

{
  lib,
  pkgs,
  ...
}:

{
  imports = [
    ./hardware-configuration.nix
    ./komodo.nix
    ./sops.nix
  ];

  # Open ports in the firewall.
  networking.firewall.enable = true;
  networking.firewall.allowedTCPPorts = [
    9120
  ];
  # networking.firewall.allowedUDPPorts = [ ... ];
  # Or disable the firewall altogether.

  # This option defines the first version of NixOS you have installed on this particular machine,
  # and is used to maintain compatibility with application data (e.g. databases) created on older NixOS versions.
  #
  # Most users should NEVER change this value after the initial install, for any reason,
  # even if you've upgraded your system to a new NixOS release.
  #
  # This value does NOT affect the Nixpkgs version your packages and OS are pulled from,
  # so changing it will NOT upgrade your system - see https://nixos.org/manual/nixos/stable/#sec-upgrading for how
  # to actually do that.
  #
  # This value being lower than the current NixOS release does NOT mean your system is
  # out of date, out of support, or vulnerable.
  #
  # Do NOT change this value unless you have manually inspected all the changes it would make to your configuration,
  # and migrated your data accordingly.
  #
  # For more information, see `man configuration.nix` or https://nixos.org/manual/nixos/stable/options#opt-system.stateVersion .
  system.stateVersion = "26.05"; # Did you read the comment?

  boot.loader.systemd-boot.enable = false;

  boot.loader.grub = {
    enable = true;
    device = lib.mkForce "";
    devices = lib.mkForce [ "/dev/sda" ];
  };

  # Select internationalisation properties.
  i18n.defaultLocale = "en_US.UTF-8";
  console = {
    font = "Lat2-Terminus16";
    keyMap = "it";
  };

  networking = {
    # Allow using nmcli/nmtui to manage connections
    networkmanager.enable = true;

    hostName = "nixos";

    # Configure a static address under VLAN `10`
    useDHCP = false;
    interfaces.eth0.ipv4.addresses = [
      {
        address = "192.168.10.2";
        prefixLength = 24;
      }
    ];

    defaultGateway = "192.168.10.1";
    nameservers = [ "192.168.10.1" ];
  };

  time.timeZone = "Europe/Rome";

  # Enable SSH disabling password and root authentication
  services.openssh = {
    enable = true;
    settings = {
      PasswordAuthentication = false;
      PermitRootLogin = "yes";
    };
  };

  # Define a user account.
  users.groups.lore = {
    gid = 1000;
  };
  users.users = {
    lore = {
      # To make sure that docker services stay alive after logout
      linger = true;
      group = "lore";
      uid = 1000;
      isNormalUser = true;
      # Enable sudo and docker for the user.
      extraGroups = [
        "wheel"
        "docker"
      ];
      # Configure the keys used to log into the user.
      openssh.authorizedKeys.keys = [
        "ssh-ed25519 AAAAC3NzaC1lZDI1NTE5AAAAICYG89383gDF4LJsKvwaxdzcNbisiCb5UDhg/z5FevBw lore@fedora"
      ];
    };

    # Add root key to redeploy the image
    root.openssh.authorizedKeys.keys = [
      "ssh-ed25519 AAAAC3NzaC1lZDI1NTE5AAAAICYG89383gDF4LJsKvwaxdzcNbisiCb5UDhg/z5FevBw lore@fedora"
    ];
  };

  security.sudo.wheelNeedsPassword = true;

  # Set up rootless docker: https://wiki.nixos.org/wiki/Docker#Rootless_Docker
  virtualisation.docker = {
    # Disable the system wide Docker daemon
    enable = false;

    rootless = {
      enable = true;
      setSocketVariable = true;
      daemon.settings = {
        # Default location for rootless docker's data
        data-root = "/home/lore/.local/docker";
        dns = [
          "192.168.10.1" # use the router's DNS
        ];
      };
    };
  };

  # Enable qemu-guest-agent to let Proxmox query the state of the VM
  services.qemuGuest.enable = true;

  # Install some utilities
  environment.systemPackages = with pkgs; [
    git
    vim
    curl
  ];

  # Allow remote updates with flakes and non-root users
  nix.settings = {
    trusted-users = [
      "root"
      "@wheel"
    ];
    experimental-features = [
      "nix-command"
      "flakes"
    ];
  };
}
This first configuration draft:
- Sets up a dedicated
lore:loreuser and group - Runs docker with the created user (in rootless mode)
- Allocates IP address
192.168.10.2and takes the server’s DNS server as the main one. - Sets up a public SSH key to access both the user
lore(for normal administration purposes) androot(when rebuilds are needed). It also hardens SSH config to disable password access. - Configures general localisation properties like keyboard and language
- Makes sure that
grubtakes on the correct partition - Adds some general utilities like
gitandvim - Specifies that only users under “
@wheel” androotare allowed to update
Disk Partitioning#
Another file is dedicated to partitioning the disk of the VM. The setup simply creates two different partitions:
- The
bios, with just 1M of space root, which takes the rest of the space and is used for the actual system.
# This file is used to partition the disk
# of the machine running NixOS
{ ... }:

{
  disko.devices.disk.main = {
    type = "disk";
    device = "/dev/sda";

    content = {
      type = "gpt";

      partitions = {
        bios = {
          size = "1M";
          type = "EF02";
        };

        root = {
          size = "100%";

          content = {
            type = "filesystem";
            format = "ext4";
            mountpoint = "/";
          };
        };
      };
    };
  };
}
Hardware Configuration#
This configuration file is not written manually: it was generated by booting a NixOS installer from the ISO (below for details) and using the command nixos-generate-configs and holds some general configurations on the firmware and boot specifications.
# Do not modify this file!  It was generated by ‘nixos-generate-config’
# and may be overwritten by future invocations.  Please make changes
# to /etc/nixos/configuration.nix instead.
{
  lib,
  modulesPath,
  ...
}:

{
  imports = [
    (modulesPath + "/profiles/qemu-guest.nix")
  ];

  boot.initrd.availableKernelModules = [
    "ata_piix"
    "uhci_hcd"
    "virtio_pci"
    "virtio_scsi"
    "sd_mod"
    "sr_mod"
  ];
  boot.initrd.kernelModules = [ ];
  boot.kernelModules = [ ];
  boot.extraModulePackages = [ ];

  swapDevices = [ ];

  nixpkgs.hostPlatform = lib.mkDefault "x86_64-linux";
}
SOPS and Secrets#
To inject secrets and credentials inside the NixOS VM, I used a package called sops-nix. This library follows the schema of SOPS, meaning it decrypts a locally-stored yml/env file using a specified key. The decrypted values are then stored on the system under /run/secrets/*, so that they can be read from other programs.
Since SOPS requires listing a public key owned by the VM to load the credentials, the installation is done in two steps:
- NixOS loads from the installer ISO
nixos-anywhereinstalls the local configuration in the remote without having specified the machine’s decryption key, meaning decryption fails the first time- I use the
ssh-to-agenix package to translate the VM’s public SSH key (/etc/ssh/ssh_host_ed25519_key) into an AGE public key. This way the VM can use its SSH key to decrypt credentials:
❯ ssh root@nixos-vm 'cat /etc/ssh/ssh_host_ed25519_key.pub' | \
nix shell nixpkgs#ssh-to-age -c ssh-to-age

age10p5qs838f2p06nnkk78fclhzt69szmtexzeu8ufgklka4c563guqcza2w9- The AGE key is added under
.sops.yamllike this:
keys:
  - &nixos age10p5qs838f2p06nnkk78fclhzt69szmtexzeu8ufgklka4c563guqcza2w9
  - &admin age15u30ark0hq8lvfwka2ukhaw7q5x0gwxyx0302lsuhw03txkacu9q3jetlh

creation_rules:
  - path_regex: secrets/.*\.ya?ml$
    key_groups:
      - age:
        - *admin
- *nixos- The new SOPS key is reapplied to the Flake configuration:
❯ nix shell nixpkgs#sops -c \
  sops updatekeys -y secrets/komodo.yaml

2026/07/26 20:59:28 Syncing keys for file /workspace/lancelot/nixos/secrets/komodo.yaml
2026/07/26 20:59:28 File /workspace/lancelot/nixos/secrets/komodo.yaml already up to date- Finally,
nixos-rebuildreapplies the new configuration to the system, placing the secrets under the correct directory
This setup works flawlessly if using docker rootful. However, in the case of docker rootless I had to solve an annoying side-problem: each credentials file under /run/secrets/ is actually a symlink to /run/secrets.d/. This becomes a problem because every time that the configuration is reapplied with rebuild, the symlinks become suddenly invalid. The only way to restore this configuration drift is to restart both the docker service and the containers referencing the secret files. I managed to do this by tweaking the komodo service (which runs docker-compose up, see below) linking it to a refresh-docker unit, which restart docker every time komodo needs to reload (which is every time the secrets change):
# This file is used to setup the SOPS provider to inject
# secrets into NixOS
{ pkgs, ... }:

{
  systemd.user.services.refresh-docker = {
    description = "Refresh rootless Docker before Komodo";

    before = [ "komodo.service" ];
    partOf = [ "komodo.service" ];

    serviceConfig = {
      Type = "oneshot";
      RemainAfterExit = true;
      ExecStart = "${pkgs.systemd}/bin/systemctl --user restart docker.service";
    };
  };

  # Merge these dependencies into your existing Komodo user unit.
  systemd.user.services.komodo = {
    requires = [ "refresh-docker.service" ];
    after = [
      "docker.service"
      "refresh-docker.service"
    ];
  };

  sops = {
    age = {
      sshKeyPaths = [ "/etc/ssh/ssh_host_ed25519_key" ];
      generateKey = false;
    };

    gnupg.sshKeyPaths = [ ];

    secrets.komodo = {
      sopsFile = ./secrets/komodo.yaml;
      format = "yaml";
      key = "";
      owner = "lore";
      group = "lore";
      mode = "0400";

      # Do not use restartUnits for this ordering.
      restartUnits = [ ];
    };
  };
}Komodo#
Komodo requires running three different components for working:
- The
core, which aggregates data from different machines interrogating theperipheryservices - The
periphery, the interface forcoreto run actual commands, like docker - A
mongodbfor the core, to store data
While initially I planned to run at least periphery on the node using a plain systemd unit, I found it easier to fall back on the official guide, which explains how to run all components using docker-compose. In my configuration, I decided to separate the db’s network from periphery, and to use env variables to specify configurations which are considered non-sensitive. Fields containing credentials, on the other hand, are saved under secrets/komodo.yaml, which is managed by sops and is mounted from /run/secrets/:
name: "komodo"

services:
  mongo:
    image: docker.io/library/mongo:8.3@sha256:a7f5aa200005611166adcec0192c2f11d0acc3bfd9d5eb68e1a998a990412e41
    command: --quiet --wiredTigerCacheSizeGB 0.25
    restart: unless-stopped
    labels:
      komodo.skip: ""
    environment:
      MONGO_INITDB_ROOT_USERNAME: mongodb
      MONGO_INITDB_ROOT_PASSWORD: mongodb
    volumes:
      - mongo-data:/data/db
      - mongo-config:/data/config
    networks:
      - core-internal

  core:
    image: ghcr.io/moghtech/komodo-core:2.2.0@sha256:7afbcfa99674bf3f51539ec3aa7235795e9b994af9b7099a6c4c654d5d8a5b6b
    init: true
    restart: unless-stopped
    depends_on:
      - mongo
    ports:
      - "0.0.0.0:9120:9120"
    extra_hosts:
      - host.docker.internal:host-gateway
    environment:
      TZ: Europe/Rome
      KOMODO_DATABASE_ADDRESS: mongo:27017
      KOMODO_DATABASE_URI: mongodb://mongodb:mongodb@mongo:27017
      KOMODO_TITLE: lore's Komodo
      KOMODO_PERIPHERY_PUBLIC_KEY: file:/config/keys/periphery.pub
      KOMODO_PERIPHERY_PRIVATE_KEY: file:/config/keys/core.key
      KOMODO_LOCAL_AUTH: "true"
      KOMODO_HOST: http://192.168.10.2
      KOMODO_FIRST_SERVER_ADDRESS: https://periphery:8120
      KOMODO_FIRST_SERVER_NAME: NixOS
      KOMODO_DISABLE_CONFIRM_DIALOG: "true"
      KOMODO_JWT_TTL: 1-day
      KOMODO_MONITORING_INTERVAL: 15-sec
      KOMODO_RESOURCE_POLL_INTERVAL: 1-hr
      KOMODO_DISABLE_USER_REGISTRATION: "true"
      KOMODO_ENABLE_NEW_USERS: "false"
      KOMODO_DISABLE_NON_ADMIN_CREATE: "false"
      KOMODO_TRANSPARENT_MODE: "false"
    volumes:
      - type: bind
        source: /run/secrets/komodo
        target: /config/config.yaml
        read_only: true
        bind:
          create_host_path: false
      - /home/lore/komodo/backups:/backups
      - /home/lore/komodo/keys:/config/keys
      - /home/lore/komodo/syncs:/syncs
    networks:
      - periphery-internal
      - core-internal

  periphery:
    image: ghcr.io/moghtech/komodo-periphery:2.2.0@sha256:7fb1a4807d125ce036a17d37c940b4001402afcaf342a2c720c98d096b1b54da
    init: true
    restart: unless-stopped
    expose:
      - "8120"
    environment:
      PERIPHERY_ROOT_DIRECTORY: /etc/komodo
      PERIPHERY_CONNECT_AS: NixOS
      PERIPHERY_CORE_PUBLIC_KEYS: file:/config/keys/core.pub
      PERIPHERY_DISABLE_TERMINALS: "true"
      PERIPHERY_DISABLE_CONTAINER_TERMINALS: "false"
      PERIPHERY_LOGGING_PRETTY: "false"
      PERIPHERY_PRETTY_STARTUP_CONFIG: "false"
    volumes:
      - /home/lore/komodo/periphery:/etc/komodo
      - /home/lore/komodo/keys:/config/keys
      - /home/lore/komodo/stacks:/etc/komodo/stacks
      - /run/user/1000/docker.sock:/var/run/docker.sock
    networks:
      - periphery-internal

volumes:
  mongo-data:
  mongo-config:

networks:
  periphery-internal:
  core-internal:
Finally, to run the actual compose I created a small user-owned systemd service:
{
  config,
  pkgs,
  ...
}:

let
  komodoDir = "/home/lore/komodo";
  komodoBackupsDir = "${komodoDir}/backups";
  komodoKeysDir = "${komodoDir}/keys";
  komodoPeripheryDir = "${komodoDir}/periphery";
  komodoSyncsDir = "${komodoDir}/syncs";
  coreComposeFile = ./composes/komodo.yaml;
in
{
  systemd.tmpfiles.rules = [
    "d ${komodoDir} 0750 lore lore -"
    "d ${komodoBackupsDir} 0750 lore lore -"
    "d ${komodoDir}/stacks 0750 lore lore -"
    "d ${komodoKeysDir} 0750 lore lore -"
    "d ${komodoSyncsDir} 0750 lore lore -"
    "d ${komodoPeripheryDir} 0750 lore lore -"
  ];

  systemd.user.services.komodo = {
    description = "Komodo Core, Periphery and MongoDB";
    wantedBy = [ "default.target" ];
    after = [
      "docker.service"
      "docker.socket"
    ];
    wants = [
      "docker.service"
      "docker.socket"
    ];
    unitConfig.RequiresMountsFor = config.sops.secrets."komodo".path;

    serviceConfig = {
      Type = "oneshot";
      RemainAfterExit = true;
      ExecStart = "${pkgs.docker}/bin/docker compose --project-name komodo --file ${coreComposeFile} up --detach";
      ExecStop = "${pkgs.docker}/bin/docker compose --project-name komodo --file ${coreComposeFile} down";
    };

    environment.DOCKER_HOST = "unix:///run/user/%U/docker.sock";
  };
}Proxmox#
Having prepared Proxmox, now what’s left is to create the configuration to spin up the Docker VM with NixOS. To do this, I started by creating a new resource to import the ISO image of NixOS from the official URL:
# Resource containing the ISO file of the NixOS image, validated
# with its SHA256 checksum.
resource "proxmox_download_file" "nixos-image" {
  content_type       = "iso"
  datastore_id       = "local"
  file_name          = "nixos-26-05.img"
  node_name          = var.proxmox-node-name
  url                = var.nixos-iso-download
  checksum           = var.nixos-iso-checksum
  checksum_algorithm = "sha256"
}
To allow better parsing, I also added a variables file:
## Proxmox Variables
variable "proxmox-node-name" {
  type        = string
  description = "The name of the Proxmox node used to run operations."
  default     = "pve"
}

## NixOS Variables
variable "install-nixos" {
  type        = bool
  description = "Boot the NixOS installer ISO rather than the installed VM disk."
  default     = false
}

variable "nixos-iso-filename" {
  type        = string
  description = "The name of the ISO file to be saved containing the NixOS image."
  default     = "nixos.img"
}

variable "nixos-iso-download" {
  type        = string
  description = "The URL used to download the NixOS ISO image."
}

variable "nixos-iso-checksum" {
  type        = string
  description = "The URL used to verify the SHA256 of the downloaded ISO."
}
And to allow executing tofu commands more easily, I filled the variables in a dediacted terraform.tfvars file:
proxmox-node-name  = "pve"
nixos-iso-download = "https://channels.nixos.org/nixos-26.05/latest-nixos-graphical-x86_64-linux.iso"
nixos-iso-checksum = "https://channels.nixos.org/nixos-26.05/latest-nixos-graphical-x86_64-linux.iso.sha256"
nixos-iso-filename = "nixos.iso"
install-nixos      = true
Finally, I created the specification for the actual VM. The specifics of it are parametrized:
# Resource creating the actual VM with NixOS. The specifications of it
# are defined as variables
resource "proxmox_virtual_environment_vm" "nixos-docker-vm" {
  name        = var.nixos-vm-name
  description = "NixOS VM containing all Docker laboratories."
  tags        = ["lancelot", "docker"]

  node_name = var.proxmox-node-name
  vm_id     = var.nixos-vm-id

  agent {
    enabled = !var.install-nixos
  }

  cpu {
    cores = var.nixos-vm-cores
    type  = "x86-64-v2-AES"
  }

  memory {
    dedicated = var.nixos-vm-ram
    floating  = var.nixos-vm-ram # docs specify it should be the same to enable ballooning
  }

  disk {
    datastore_id = var.proxmox-disks-pool-name
    interface    = "scsi0"
    size         = 32
  }

  boot_order = var.install-nixos ? ["ide2", "scsi0"] : ["scsi0"]

  cdrom {
    interface = "ide2"
    file_id   = var.install-nixos ? proxmox_download_file.nixos-image.id : "none"
  }

  network_device {
    bridge  = var.homelab-bridge-name
    vlan_id = var.homelab-docker-vlan-id
  }

  operating_system {
    type = "l26"
  }

  serial_device {

  }

  tpm_state {
    version = "v2.0"
  }
}
The idea of the install-nixos variable is that installing NixOS for the first time requires mounting a cdrom with the installation ISO and booting from it. Since this step is not needed once the OS has already been installed, the variable controls che current lifecycle of the machine: once the installation is done, I can switch it to false and have the VM boot from disk normally.
After applying the changes, the existing pfSense VM gets imported, while the other one is created successfully. The final OpenTofu directory structure looks like this:
.
├── data.tf
├── docker-vm.tf
├── .env
├── .env.example
├── main.tf
├── network.tf
├── pfsense-vm.tf
├── .sops.yaml
├── .terraform
├── .terraform.lock.hcl
├── terraform.tfstate
├── terraform.tfvars
└── variables.tf
Since I selected to use the minimal ISO image for NixOS, once the VM boots there is no installation GUI to follow. This is deliberate: the procedure of applying the Nix configuration will be delegated to nixos-anywhere, which will connect to the machine via SSH and apply the configurations.
Installation#
The installation procedure can be roughly divided into three phases:
- Proxmox creates and boots the VM from the ISO installer. Through the console, I can add a password to login via SSH and go to the next configuration step
- I login via SSH to the ISO installer and use
nixos-anywhereto install the actual NixOS configuration - From the running VM, I dump the public SSH key, configure SOPS to recognize it and run
nixos-rebuildto apply the configuration
If any future modifications are made, step 3 can be repeated without the SOPS part
1. Creating the VM#
From the tofu/ subdir, I start by specifying the previously-created variable install-nixos to true and run tofu apply:
❯ tofu apply -auto-approve
# ...
ephemeral.sops_file.proxmox_secrets: Closing...
ephemeral.sops_file.proxmox_secrets: Close complete after 0s

Apply complete! Resources: 2 added, 0 changed, 0 destroyed.
The generated VM will have an IP which is decided by pfSense’s DHCP, meaning that reaching it requires specifying it every time I invoke ssh. To facilitate the connection (since I need to use the configured bastion VM as a jump box), I also created two entries under ~/.ssh/config:
Host bastion-jump
    HostName 192.168.0.251
    Port 222
    User jump

    PreferredAuthentications publickey
    PasswordAuthentication no
    KbdInteractiveAuthentication no

# NixOS VM under VNAT 10
Host nixos-vm
    HostName 192.168.10.2
    User lore
    Port 22

    # Specifies that `bastion-jump` must be used to reach this host
    ProxyJump bastion-jump

    PreferredAuthentications publickey
    PasswordAuthentication yes
    KbdInteractiveAuthentication yes

# NixOS VM (for installer)
Host nixos-installer
    HostName 192.168.10.112 # the IP of the generated VM (check via `ip a`)
    User root
    Port 22

    # Specifies that `bastion-jump` must be used to reach this host
    ProxyJump bastion-jump

    PreferredAuthentications publickey
    PasswordAuthentication yes
    KbdInteractiveAuthentication yes
From the console, I also configure a temporary password to be used for SSH access. Once that’s done, I can connect via SSH and add my public key (for faster deployment):
❯ ssh root@nixos-installer
root@192.168.10.112's password:

[root@nixos:~]# echo 'ssh-ed25519 AAAAC3NzaC1lZDI1NTE5AAAAICYG89383gDF4LJsKvwaxdzcNbisiCb5UDhg/z5FevBw lore@fedora' > ~/.ssh/authorized_keys

[root@nixos:~]#If this is actually the first VM boot, it is also necessary to generate the hardware-configuration.nix to add locally with the command:
nixos-generate-config --root /mntThe output can then be found under /mnt/etc/nixos
2. Install the local Config#
Now that access via SSH is possible, the local configuration can be imported to the running VM via nixos-anywhere, running it directly from the lancelot/nixos directory:
❯ nix run github:nix-community/nixos-anywhere -- \
  --flake "path:$PWD#nixos-docker" \
  --target-host nixos-installer
# ...
channel 0: open failed: connect failed: Connection refused
stdio forwarding failed
Connection closed by UNKNOWN port 65535
### Done! ###
#nixos-docker is the key specified in flake.nix under nixosConfigurations.nixos-docker. nixos-installer, instead, is the address which is used to create the SSH connection to the target machine.
path:Flakes are better supported when used with git. This way, nixos-anywhere can use the files actually committed to the repo as the “running” configuration. This part will be better setup once the repository for the Nix configs is created.
Before connecting to the provisioned VM, there is one small change that needs to be made. By default, once nixos-anywhere finishes the installation it automatically reboots the VM. However, if nothing is changed, Proxmox will simply reboot the installer, because that’s the boot order that was specified. The fastest fix to this is to:
- Force-stop the running VM (it cannot be gracefully stopped, since
qemu-guest-agentis not running) - Go back to terraform and change
install-nixostofalse - Run
tofu applyonce again, so that the correct boot order is enforced:
❯ tofu apply -auto-approve
# ...
ephemeral.sops_file.proxmox_secrets: Closing...
ephemeral.sops_file.proxmox_secrets: Close complete after 0s

Apply complete! Resources: 0 added, 1 changed, 0 destroyed.
To verify that everything worked, I can SSH inside the provisioned machine:
❯ ssh nixos-vm

[lore@nixos:~]#
Nice! Now I only need to fix the last point to make sure that SOPS secrets are injected correctly
3. Load the SOPS key#
To conclude the final section, I start by dumping the VM’s public SSH key and translate it to the AGE format:
❯ ssh nixos-vm \
  'cat /etc/ssh/ssh_host_ed25519_key.pub' |
nix shell nixpkgs#ssh-to-age -c ssh-to-age
age18et4e6dn8pr0u842erga2rmy4dz3dpdzj2d3w4ymr6lnm0zfa92q75d5wt
This public key can then be added to my .sops.yaml:
keys:
  - &nixos age18et4e6dn8pr0u842erga2rmy4dz3dpdzj2d3w4ymr6lnm0zfa92q75d5wt
  - &admin age15u30ark0hq8lvfwka2ukhaw7q5x0gwxyx0302lsuhw03txkacu9q3jetlh

creation_rules:
  - path_regex: secrets/.*\.ya?ml$
    key_groups:
      - age:
        - *admin
        - *nixos
Then, add the new key to the actual Flake:
❯ nix shell nixpkgs#sops -c \
  sops updatekeys -y secrets/komodo.yaml
2026/07/26 21:38:20 Syncing keys for file /workspace/lancelot/nixos/secrets/komodo.yaml
The following changes will be made to the file's groups:
Group 1
    age15u30ark0hq8lvfwka2ukhaw7q5x0gwxyx0302lsuhw03txkacu9q3jetlh
+++ age18et4e6dn8pr0u842erga2rmy4dz3dpdzj2d3w4ymr6lnm0zfa92q75d5wt
--- age10p5qs838f2p06nnkk78fclhzt69szmtexzeu8ufgklka4c563guqcza2w9
2026/07/26 21:38:20 File /workspace/lancelot/nixos/secrets/komodo.yaml synced with new keys
Finally, the local configuration can be applied to the remote VM using nixos-rebuild:
❯ nix run nixpkgs#nixos-rebuild -- \
  switch \
  --flake "path:$PWD#nixos-docker" \
  --target-host root@nixos-vm
building the system configuration...
copying 3 paths...
copying path '/nix/store/1wp6yz7xnsz8r3rwv2qmvsg4lynkpj12-komodo.yaml' to 'ssh://root@nixos-vm'...
copying path '/nix/store/yym04gk5dpcgm7xfiz5f58npb97s81z7-manifest.json' to 'ssh://root@nixos-vm'...
copying path '/nix/store/y76jmf64czgn8p38l7ndivkkijgfnmxb-nixos-system-nixos-26.05.20260722.b3fe958' to 'ssh://root@nixos-vm'...
Checking switch inhibitors... done
updating GRUB 2 menu...
activating the configuration...
setting up /etc...
sops-install-secrets: Imported /etc/ssh/ssh_host_ed25519_key as age key with fingerprint age18et4e6dn8pr0u842erga2rmy4dz3dpdzj2d3w4ymr6lnm0zfa92q75d5wt
reloading user units for lore...
restarting the following user units: nixos-activation.service
reloading user units for root...
restarting the following user units: nixos-activation.service
restarting sysinit-reactivation.target
the following new units were started: NetworkManager-dispatcher.service, sysinit-reactivation.target, systemd-tmpfiles-resetup.service
Done. The new configuration is /nix/store/y76jmf64czgn8p38l7ndivkkijgfnmxb-nixos-system-nixos-26.05.20260722.b3fe958
Verify Komodo#
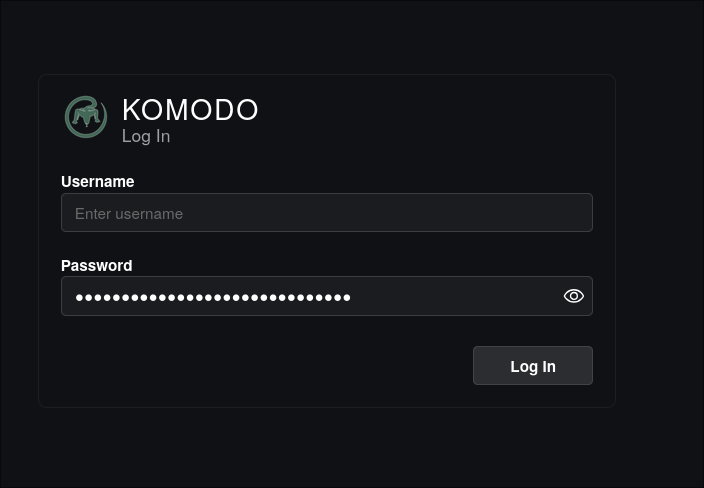
To verify that Komodo and everything else is working, access to the UI is possible using a small SSH tunnel:
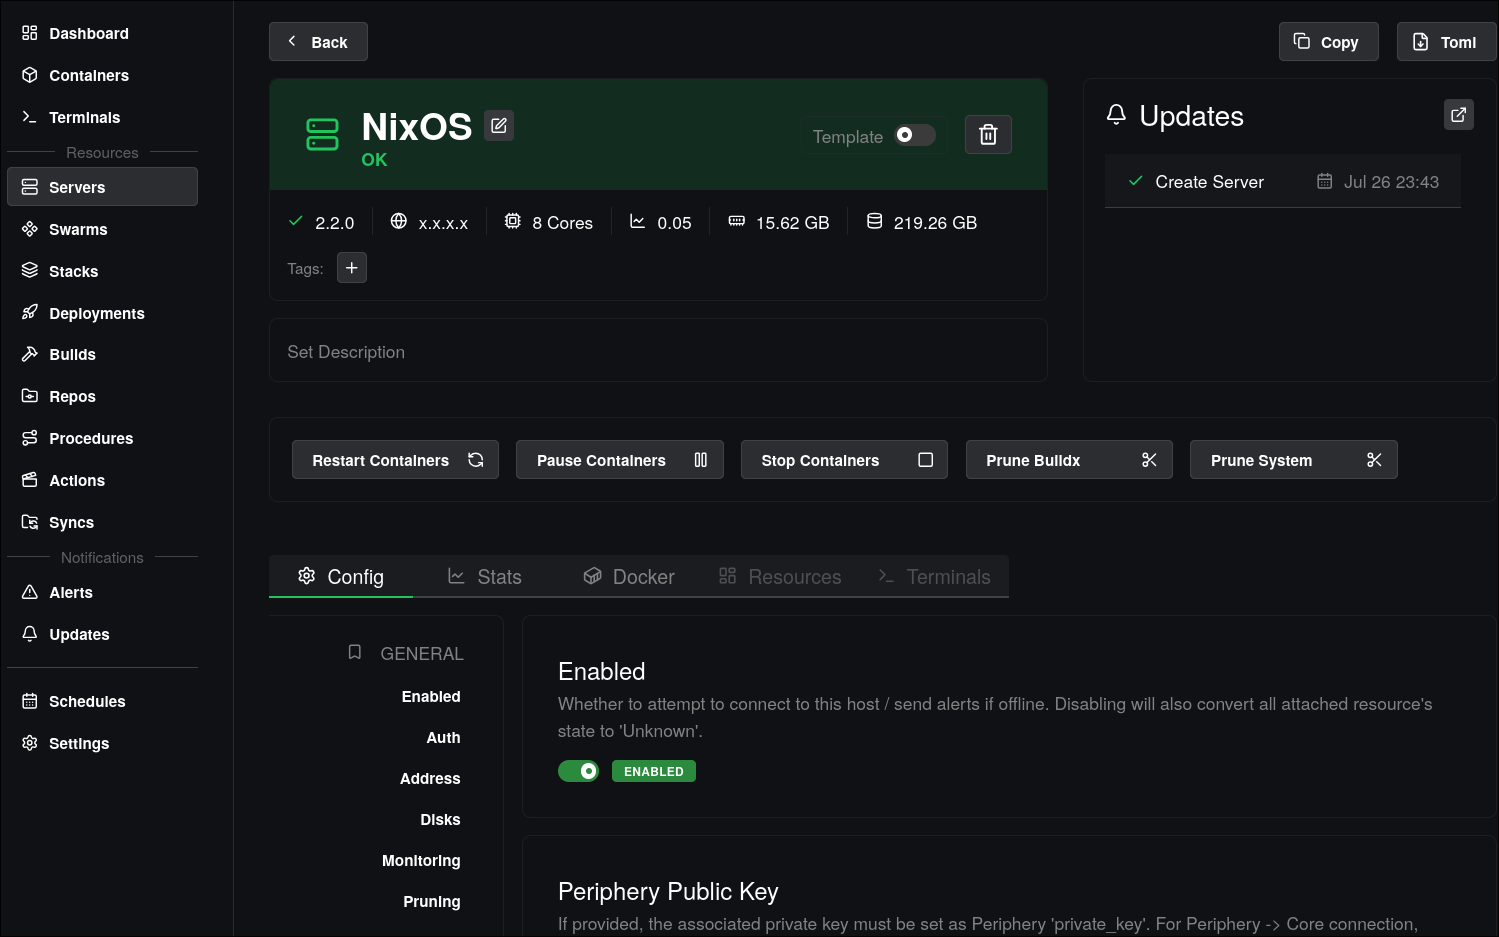
ssh nixos-vm -L 8080:localhost:9120If everything worked correctly, accessing http://localhost:8080 should show Komodo’s login UI:
Which should allow logging in using default credentials, if specified in the encrypted configs, and show the connected periphery server:
Wrapping Up and Future Works#
Overall, the NixOS configuration and installation was actually pretty fun and satisfying. Specifying everything under *.nix files went a lot smoother then I expected, although finding and linking each component (like anywhere and rebuild) was the actual hard part. I would recommend trying Nix at least once, but I’m not sure whether I would recommend it for non-experimental environments. The technology is very promising, but maybe a bit too new.
In the next posts, I will use the configured Komodo instance to run a couple of useful services and route them to the public internet. For now, thanks for following! :)